Do you own a building with a flat or low-slope roof in Onalaska? Rain, snow, and freeze-thaw cycles can all put that roof to the test. Spray foam is one way to restore a suitable roof without a full tear-off. It forms a continuous layer over seams and fasteners, while penetrations, edges, and drains still need careful detailing.
If you’re considering spray foam roofing in Onalaska, WI, this guide explains how the roof is prepared, how the foam and coating go on, and what maintenance it needs. For related guidance, see our article on spray foam roofing in Eau Claire, WI. Have questions about your building? Call Golden Eagle Roofing at 608-633-6719.
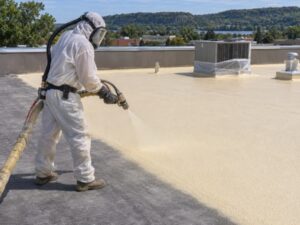
What Is Spray Foam Roofing?
Spray polyurethane foam (SPF) starts as two liquids. They mix at the spray gun, expand, and bond to the prepared roof surface. The result is a firm layer with no laps or seams of its own.
Spray foam adds insulation above the roof deck. It can be used on flat and low-slope roofs, such as those on shops, offices, warehouses, schools, and churches. Wall and attic insulation are separate parts of the building’s design.
Roof Spray Foam vs. Interior Spray Foam Insulation
People often mix these two up. Roof SPF is a higher-density, closed-cell foam made for roofing assemblies. It needs protective surfacing. Interior spray foam goes inside the building and can be open-cell or closed-cell.
| Feature | Roof Spray Foam | Interior Spray Foam Insulation |
|---|---|---|
| Location | Above the roof deck or an approved existing roof surface | Inside walls, attics, or roof framing |
| Purpose | Part of the roof’s weather protection and insulation | Insulation and air sealing |
| Exposure | The finished roof faces sun, rain, snow, hail, and service traffic | Sheltered from outdoor weather |
| Surface protection | Coated SPF systems use a compatible protective roof coating | No roof coating; a thermal or ignition barrier may be required depending on the assembly |
This post covers the roof system only.
Step 1: Getting the Roof Surface Ready
Good prep determines how well the foam bonds. What needs checking depends on the substrate, the surface the foam will be sprayed onto:
- Metal: Rust, loose or backed-out fasteners, and open seams.
- Tar and gravel: Blisters, loose gravel, and cracks.
- Concrete: Moisture, cracks, and areas where the surface is flaking away.
- Rubber (EPDM): Whether the membrane is compatible, whether sheets are loose, and whether the insulation below is dry.
Check for trapped moisture. Depending on the roof, an assessment may use infrared scans, core samples, or moisture meters. Remove wet materials and repair damaged decking before covering the roof. Trapped moisture can interfere with adhesion and contribute to blistering.
Clean and repair the surface. Remove dirt and loose debris using a method suited to the roof. Repair loose flashing and clean and prime metal where the system calls for it.
Check the weather limits. The roof must be dry and free of rain, frost, and dew. Air temperature, surface temperature, and the margin above the dew point must meet the foam manufacturer’s application limits.
Control overspray. Protect nearby walls, windows, vehicles, and rooftop equipment as needed. Wind can carry spray beyond the work area, so pause if conditions exceed product limits or overspray cannot be controlled.
Step 2: Spraying the Foam
The foam starts to set within seconds, but it takes longer to cure. It goes on in passes. The manufacturer’s instructions determine how thick each pass can be and how long to wait before adding the next one.
The final foam thickness depends on:
- Slope needs: How much buildup is needed to move water toward drains.
- Insulation target: The R-value specified for the roof assembly.
- Deck condition: Whether the structure and existing roof can support the proposed assembly.
Check installed foam depth against the project specification. Foam can be built up in some low spots to steer water toward drains, but recurring ponding may also call for drain or slope work.
In Onalaska, cold weather and damp roof surfaces can narrow the spray window. Scheduling depends on site conditions and the selected product’s limits.
Step 3: Adding the Protective Coating

Bare foam degrades in sunlight. In a coated SPF system, apply the protective coating once the foam surface is ready and within the manufacturer’s application window. Silicone and acrylic are common options.
| Feature | Silicone | Acrylic |
|---|---|---|
| Standing water | Some products are rated for ponding; check the product and warranty | Generally better suited to roofs that drain well |
| UV resistance | Provides UV protection in an approved system | Provides UV protection in an approved system |
| Dirt pickup | Can pick up dirt over time | Varies by formulation and site conditions |
| Cost | Compare installed cost at the specified thickness | Compare installed cost at the specified thickness |
Coating thickness: The selected system specifies the number of coats and the required dry film thickness, measured in mils. A wet film gauge can check freshly applied coating against the specified wet thickness. Follow the project and product requirements for verifying the finished coating.
Roof edges, flashings, curbs, pipes, vents, and drains need details suited to the system. Those details may call for compatible coating, reinforcing fabric, or sealant.
Light-colored coatings reflect sunlight. The effect on cooling depends on the building. Where the system allows it, granules can improve grip, and compatible walkway pads can protect routes to HVAC units.
For more background, read our guide to analyzing spray foam roofing.
Maintenance Routine for a Foam Roof
Leave hands-on roof checks to trained, authorized people using appropriate fall protection. Building staff can report visible problems from a safe location. Coated roofs can be slippery when wet.
| When | What to Check |
|---|---|
| Spring check | Look for winter damage and blocked drains. |
| Fall check | Check the coating and clear debris from drains before winter. |
| After hail or high wind | Arrange a check for punctures, coating damage, and torn flashing once conditions are safe. |
| After a repair | Ask the roofer when to recheck the repaired area. Report any new stains or drips after rain. |
Look for cracks, blisters, thin or chalky coating, punctures, dents, soft spots, and water still standing about 48 hours after rain in normal drying conditions.
If you spot a problem, take a photo from a safe location, mark the area on a roof map, and call your roofer. Avoid hardware-store sealant. A patch that does not bond to the existing coating can make a proper repair harder.
Keep service records with the date, who did the work, what they found, what they repaired, and when to check again. These records help with repair planning and can document maintenance if the warranty requires it.
Recoating: Timing depends on the coating type, wear, weather exposure, and inspection findings. Have thinning coating assessed before bare foam is exposed.
When Spray Foam Fits, and When It Doesn’t
Spray foam can be a good choice when:
- The existing roof is dry, or localized wet areas can be removed.
- The deck is sound and can support the proposed system.
- The flat or low-slope roof is compatible with the system.
- Drains work or can be corrected.
SPF covers seams and fasteners with a continuous layer and adds insulation above the deck. It can limit tear-off when the existing roof qualifies for a recover.
Widespread trapped moisture, significant deck damage, or a roof profile unsuitable for the system may point to a different approach.
What to Discuss at Your Onalaska Roof Visit
If you’re considering spray foam roofing for your building, ask Golden Eagle Roofing which checks are appropriate and what the written proposal will cover:
- Whether moisture testing is needed
- Deck and substrate condition
- Drains and slope
- Flashing details around penetrations and curbs
- Recommended foam thickness and coating type
- Written scope of work and applicable warranty terms
Call Golden Eagle Roofing at 608-633-6719 or use our contact page to discuss your roof and request a quote.
Frequently Asked Questions
How long does spray foam roofing last in Onalaska, WI?
Service life depends on the coating, weather exposure, foot traffic, and maintenance. Regular checks and timely recoating help protect the foam. Warranty length is separate from service life, so ask for the terms for the proposed system.
Can spray foam go over my old roof?
Sometimes. A recover may be possible if the existing roof is dry and compatible, the deck is sound, and the proposed assembly meets applicable requirements. Moisture testing may be needed to determine which areas must be removed before the new roof goes on.
Is roof spray foam the same as attic spray foam?
No. Roof SPF is a higher-density, closed-cell foam designed for a roof assembly and needs protective surfacing. Attic spray foam is a separate product used for insulation and air sealing inside the building.
Can you install spray foam in the winter?
Only when the roof is dry and the air temperature, surface temperature, and dew point meet the product manufacturer’s limits. Cold or damp conditions in Onalaska can limit when the work can go ahead.
How long does a spray foam roof install take?
The schedule depends on roof size, repairs and prep, the time required between applications, and the weather. Ask for a project timeline after the roof has been assessed.
Does spray foam roofing help with energy bills?
SPF adds insulation above the roof deck, and light-colored coatings can reflect sunlight. Whether that lowers energy bills depends on the foam thickness, existing insulation, and how the building is used, heated, and cooled.